Linux Lite, one of the best lightweight distros and Windows alternatives, has released a testing version of their upcoming v5.0. The first release candidate (rc1) of Linux Lite 5.0 is the most feature-rich and complete Linux Lite release till now. So, let’s take a look at the list of new changes that’ll ultimately ship with final v5.0.
Linux Lite 5.0: New Features
System Boot Settings
Inheriting the permanent feature from the previous Linux Lite 4.8, v5.0 turns the UEFI and SecureBoot considerations into reality. You can now boot Linux Lite in secure UEFI boot mode.
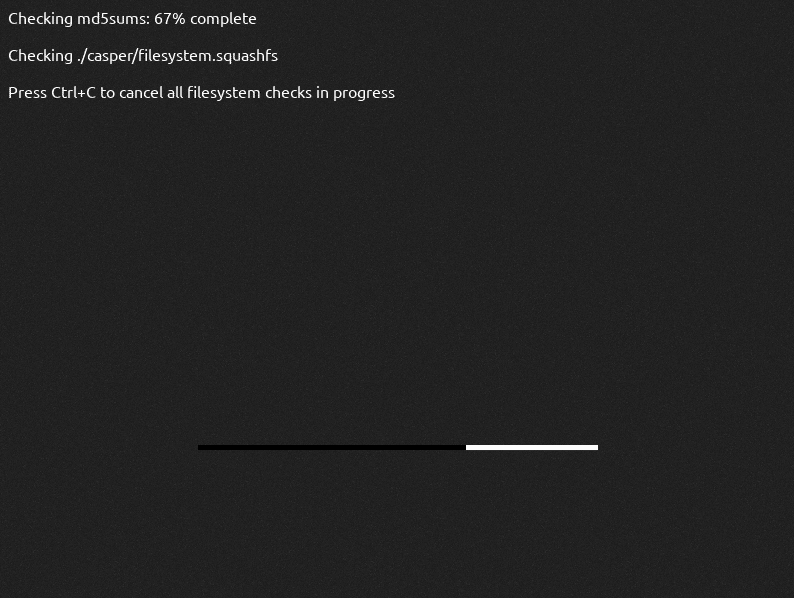
While booting, Lite 5.0 checks for filesystem integrity, which is now part of Linux Lite upstreaming from Ubuntu. Amid that, you can press CTRL+C to cancel it.
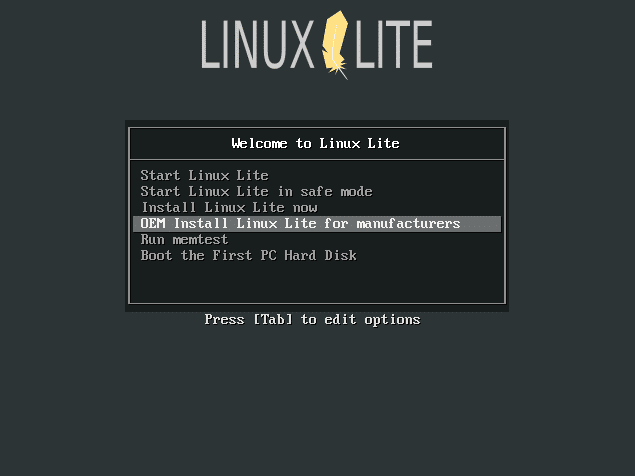
As soon as you reach the boot menu, you’ll notice a new entry on the boot menu list. Yes, you can also boot into Linux Lite in OEM (Original Equipment Manufacturer) mode.
If you don’t know, an OEM installer is an option especially for a manufacturer of computer systems. In this mode, the OS creates a temporary user and later lets the end-users create an actual account and configure the system to their own preference.
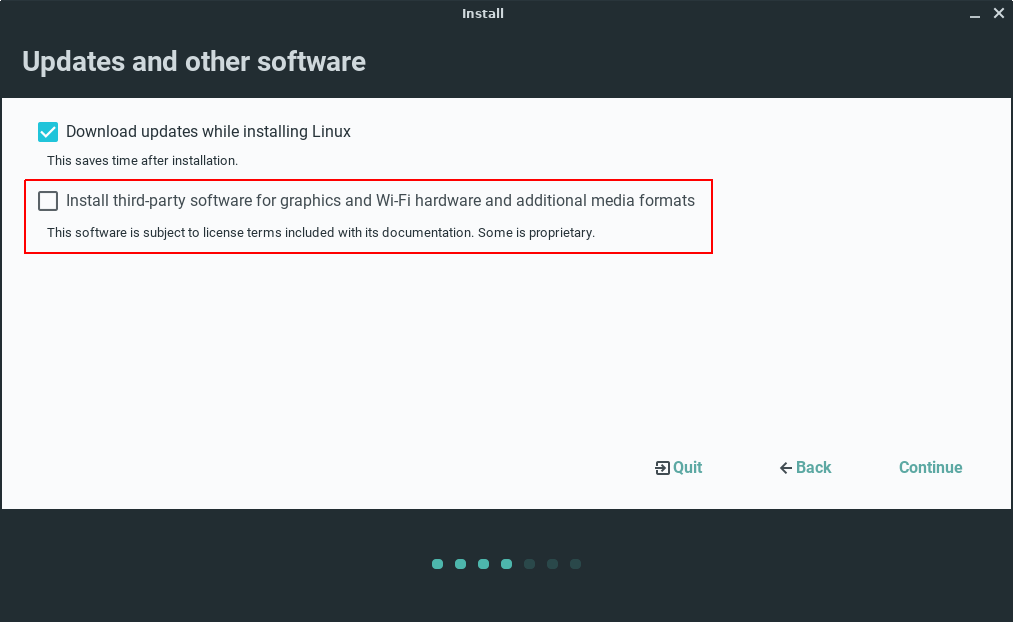
After choosing an option, the installer has a new change in Updates and other software section. You can check it to install your hardware drivers during the installation, for example, for your NVIDIA video card.
Theming And New Designs
Moving to visual appearance, the lightweight Linux Lite 5.0 also makes the user interface of various components more polished and clean. As you finish the installation, Lite welcomes you with the redesigned Lite Welcome program that builds with updated GTK3.
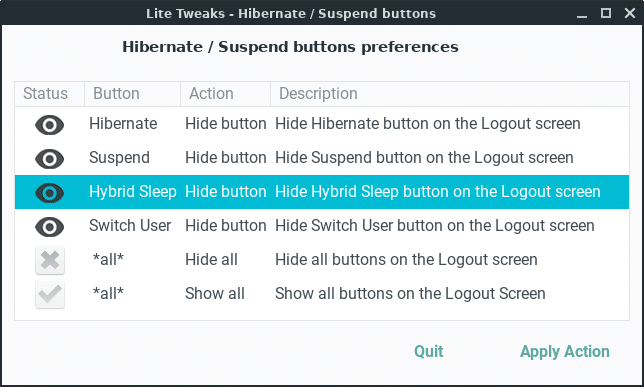
The logout screen also gets a new furnished design with more details and new options.
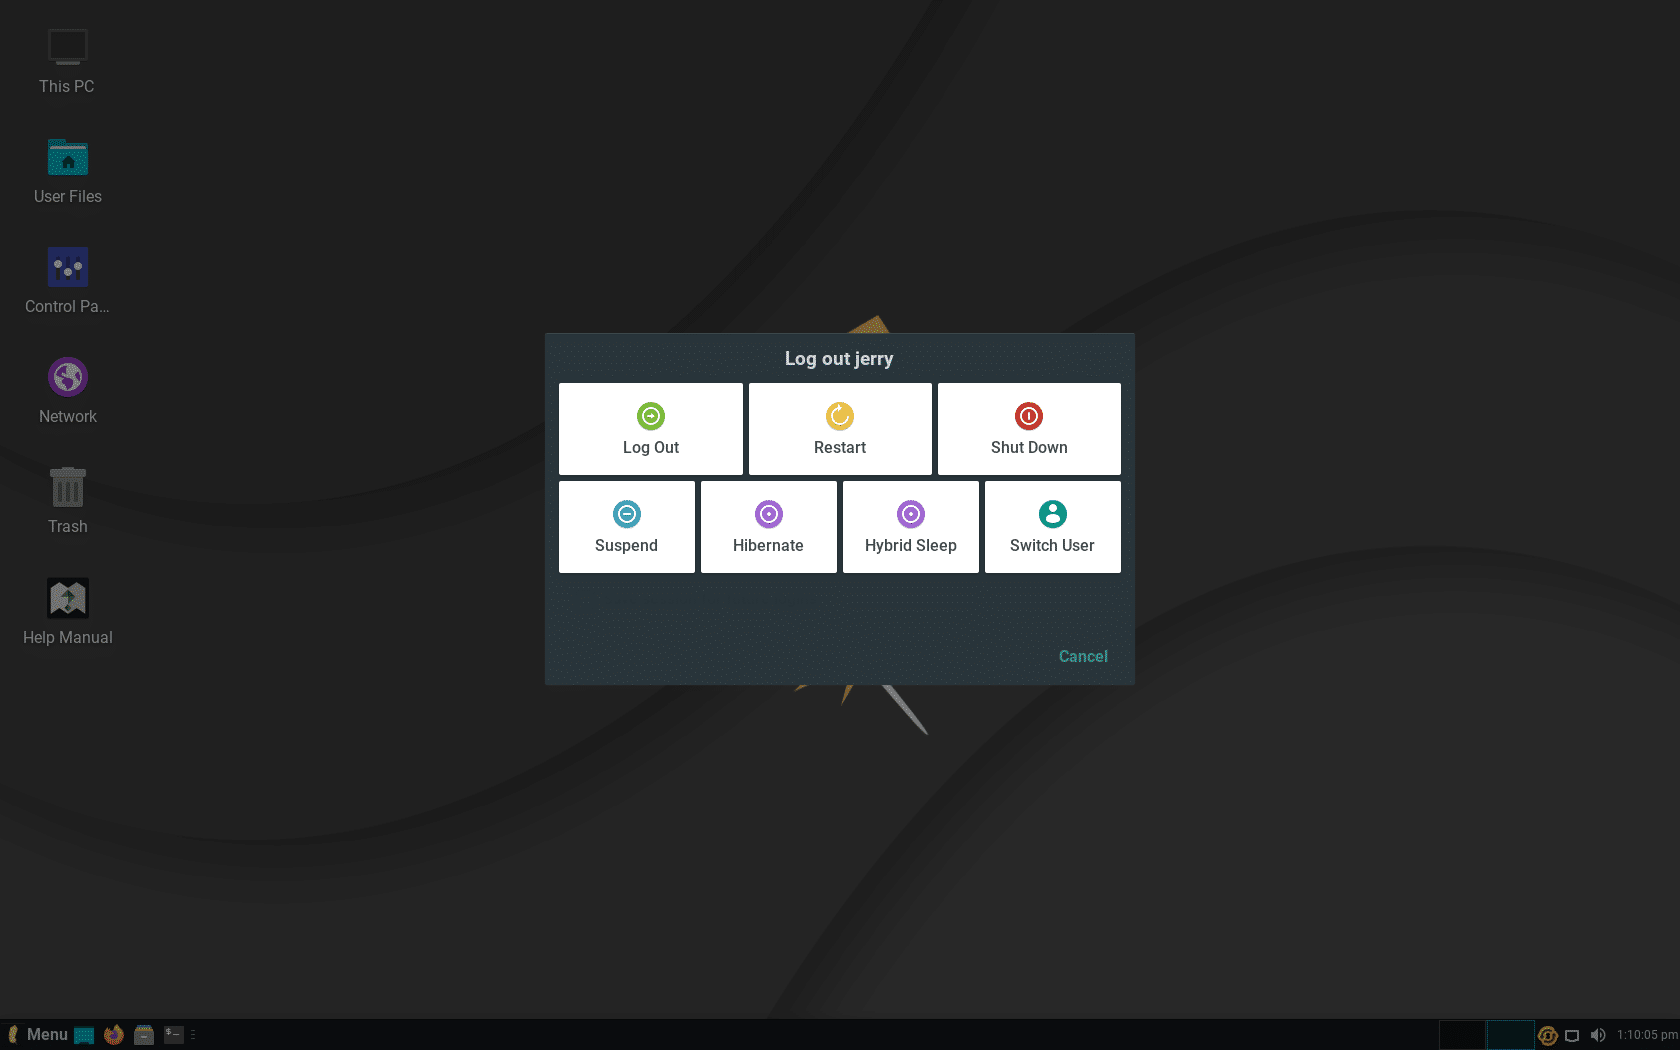
Many options on the logout screen may not be of your daily use. Hence, you can also customize the screen with the desired option displayed in the log out screen.
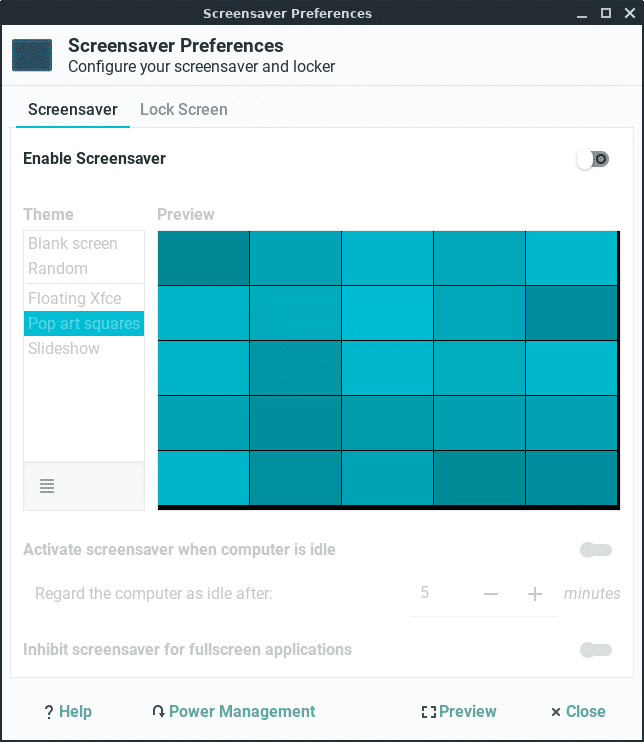
Linux Lite has a default Xfce desktop environment which makes it more lightweight. Hence, to enhance the user experience, you now have the Xfce screensaver. Though it is disabled by default, you can enable it later and add your favorite theme.
Lite Software
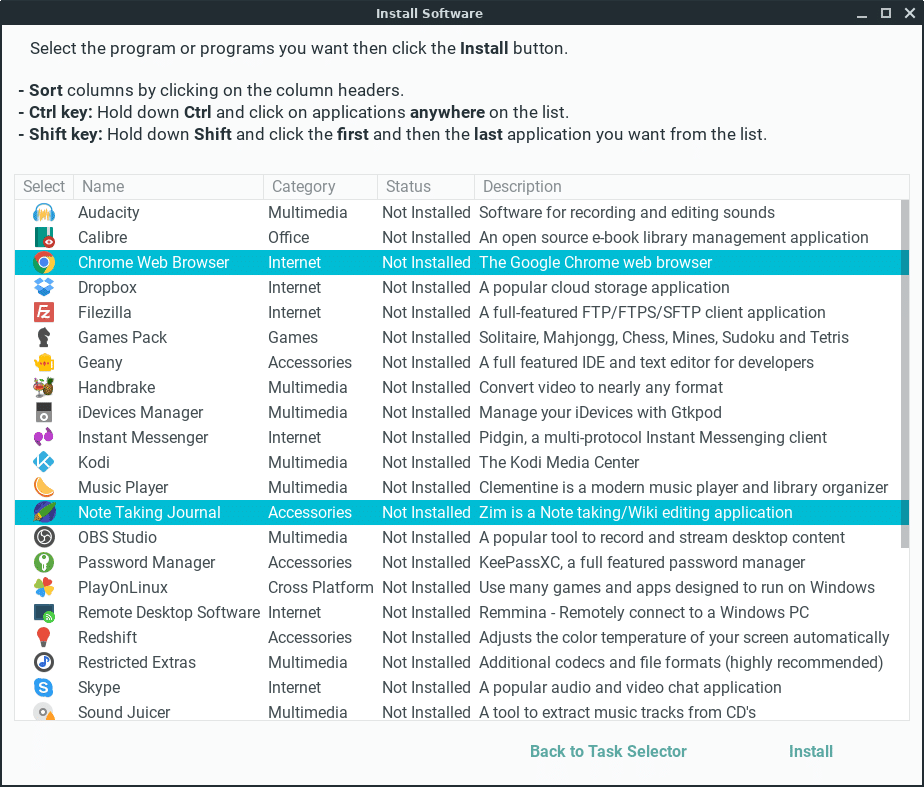
Coming to the software package, Lite 5.0 drops Pinta, a cross-platform bitmap image drawing and editing program. Instead of Pinta, you can look for GIMP.
New Note-taking app Zim enters v5.0, replacing the previously unsupported CherryTree. Chrome also comes in with Chromium as a Snap package. Lastly, you can access Paint directly from the Accessories.
Other Enhancements
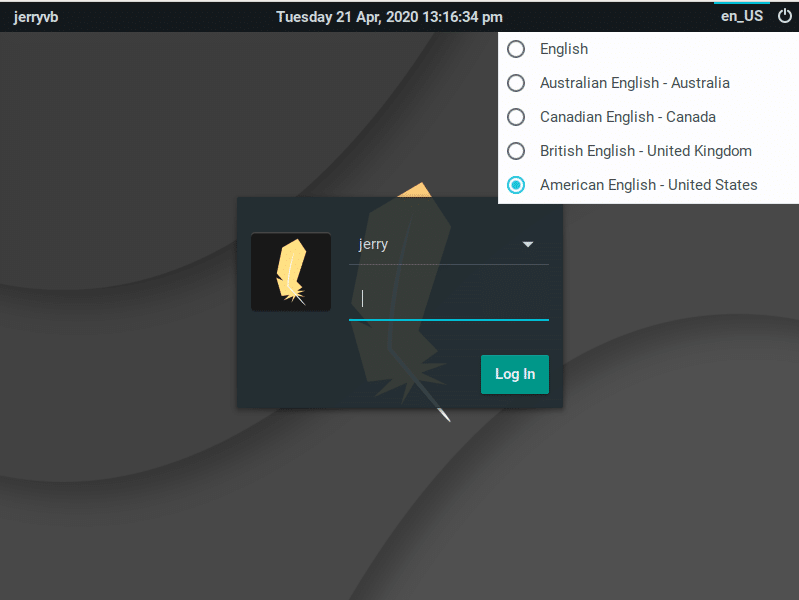
Before you log in to Linux Lite, you can now also choose the language you’re more comfortable with.
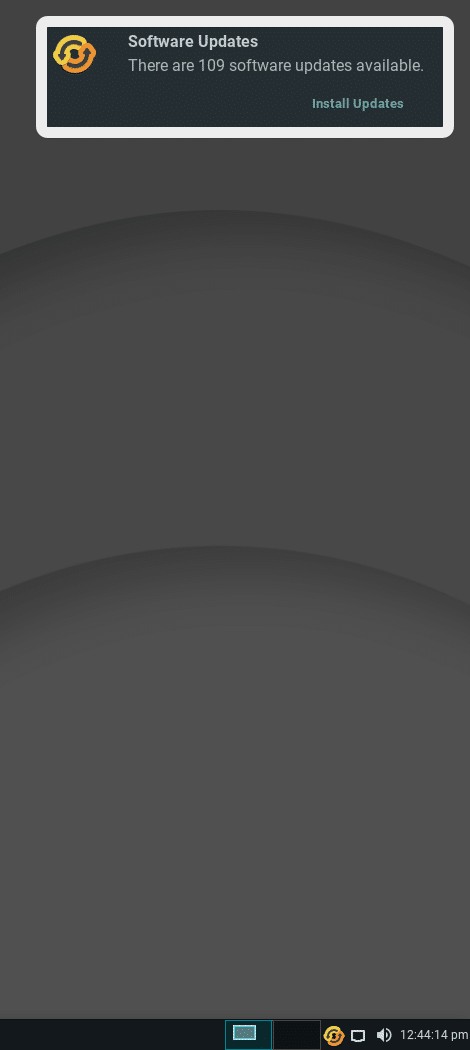
You may not like it, but a new updater notifier is now enabled by default to ping you twice a day about new software updates. Of course, you can also disable it from Menu Settings>Session and Startup>Application Autostart tab and then untick Package Update Indicator.
Here is a list of other new changes:
- Dual Architecture Support
- Trash Bin works as expected on Desktop
- No hidden telemetry
- Replacing GUFW with a highly configurable FireWallD
- Adding Firewall status to Lite Widget
More new features are yet to be revealed before the final release of Linux Lite 5.0.
How To Download And Install Linux Lite 5.0?
Now after reading so many new features, you must be wanting to download and try it out right now. But before installing it, check the minimum system requirements for Lite (which is very low):
- 1GHz processor
- 768MB RAM
- 8GB HDD/SD
Currently, the testing version of Linux Lite 5.0 is already available. So, you can download the ISO image from the official link here. Also, it is highly recommended to not use v5.0-rc1 for productions.
Now burn the ISO image to 2GB or larger USB stick or writable DVD. You can use third-party software like Etcher. Alternatively, you can use the dd command:
sudo dd if=linux-lite-5.0-rc1-64bit.iso of=/dev/sdx bs=4M
where ‘x’ is the letter of your USB stick.
NOTE: Rufus, Yumi, Multiboot and other multi-boot applications are not supported.
Finally, boot the system with a USB stick and install Linux Lite 5.0 to enjoy the best lightweight Linux distro.
Comments